I still have to finish and upload the artefact video to Polycount, Artstation and Facebook, but it will not take me too much time.
I have been creating the slides for the presentation and I need to prepare my speech and practice in order to do it properly. The whole process of the presentation is taking me longer than I expected but I will have everything on time for sure.
I have been helping Nandor to get my projects properly migrated to his environment and tried to calm him down as he was getting very stress and a bit depressed. I have tried to help him as much as I can in order to motivate him so he can properly finish their tasks. I think he will be OK. I am a bit nervous about the presentation as I have very bad memory and doing it in English can be quite problematic for me by the moment as I am still stuck, trying to remember words or wanting to say things in a particular way. I hope all goes just fine and I do my best.
I have borrowed Nandor’s environment and created some footage in unreal using sequencer in order to create my own artefact showing the characters and the final result of my project.
I edited the videos in premiere as I did with the promotional video and used the concept art I created. I have also made in Photoshop a collage for the intro screen and the end screen of the video. In this case I used Kai Engel’s Calls and Echoes song.
I will do the slides for the presentation tomorrow and prepare a speech script. I hope have enough time to learn it and don’t get nervous on the presentation. With the presentation next Tuesday I will be finishing the Master so the project can be considered done.
Subsurface Scattering (SSS) or Subsurface light transport (SSLT) is a physic light behavior when it penetrates a translucent surface, being scattered and bouncing in the interior of an object in a certain depth depending on the material characteristics to finally get out, making it glow, softening the shapes and making it have brighter colours but also, showing the inner characteristics of the material, in the skin’s case, veins, muscles or bones.
The next video explains the different behaviors the light has with materials depending on the properties of the object:
As video game and film industries’ projects have become more and more realistic, in order to try to break through the uncanny valley, one of the most important features that an object or a realistic living have needed to incorporate has been a SSS systems that accurately emulate real light behavior. Technology has also evolved to achieve better and better results, being Separable Subsurface Scattering one of the latest research in this matter:
Light and its interaction with materials has been always a very resource consuming features for the rendering process. Therefore, in the case of videogames that have to reproduce this realistic rendering effect in real-time have become a real challenge. Game engines like Unreal or Unity have already developed tools that emulate this effect in real time. Nevertheless, due to the real-time rendering and current hardware technology constrains it is still not perfect and will be improved in the future. Even though, this has entailed a great step in the good direction allowing game companies to create very believable characters and astonishing environments never imagined before. https://www.youtube.com/watch?v=NJq1meIXtb0
During this course I have learnt the basics of Unreal engine. Therefore I will center my effort in knowing how to use SSS in this engine. In the next video is explained the process to use SSS and create photorealistic character materials in Unreal:
In my opinion, learn how to create subsurface materials is a very important feature that all 3d game artist should know. I have discovered along this course that shaders represent a big percentage of the quality of the final model presentation. Nevertheless, due to time and planning constraints I didn’t have time to learn how to apply SSS materials to my models but I received very good feedback, advices and references to apply it in future models. I am very happy with the result of my project but I can’t imagine how good my characters would look if I would have used SSS on them. Therefore, I will study and practice how to do this kind of materials to include them in my workflow in order to create better quality models.
Bibliography:
Two Minute Papers (n.d.) Separable Subsurface Scattering | Two Minute Papers #66 [Online video]. Available from: <https://www.youtube.com/watch?v=72_iAlYwl0c >.[Accessed 18 August 2017]
Jimenez, J., Zsolnai, K., Jarabo, A., Freude, C., Auzinger, T., Wu, X.C., der Pahlen, J., Wimmer, M. and Gutierrez, D., 2015, September. Separable subsurface scattering. In Computer Graphics Forum (Vol. 34, No. 6, pp. 188-197).
I have started the production of the promotional video. I met with Harry Kontaxis so he can help me to record some footage with a camera borrowed from the university. We spent all the morning recording scenes of me walking down stairs, siting on different places of the university and working on the PC. I also recorded myself working with the computer using a tripod back in home.
I have also wrote a script and recorded a speech creating several short files as was difficult to me to do all it at once. I will be using this as a background speech of my video as I couldn’t speak directly to the camera and also because I think in this way it would look more professional.
I have been editing the video and created new footage within the computer recording the screen using Icecream Screen Recorder.
I also used a free common’s song created byAlexey Anisimov called Electronic Presentation as a background of my video and speech.
Bibliograpgy:
Screen Recorder: Record Screen or Make Screenshots Free – Icecream Apps (n.d.) [Online]. Available from: <https://icecreamapps.com/Screen-Recorder/ > [Accessed 17 August 2017].
I planned this project in a way that I could learn the whole process of a character creation, from concepting to animating, going through all the in between steps like modeling, UV maping, texturing, shading and rigging as well as setting all the assets in unreal to have them ready to use in an game engine. Doing this, I have been able to get feedback in order to improve my own character designs and models by, for example, trying to avoid hard surfaces like horns or holes on articulations, creating a proper meshes to avoid deformation or taking into account the limbs’ movement in order to design the character body. It also allow me to improve my skills in programs that I alredy used in my workflow like Zbrush, Maya and Unreal and add new ones like Topogun, Road kill or xNormals. I also Used new forefront techniques like using Mayas’s Xgen in order to create high quality Hair textures following the workflow of a professional character artist as Adam Skutt who worked in AAA games projects like The Order 1886 or Uncharted 4.
I have also learn a lot by trial and error, like knowing that UDIMs can’t be used in unreal projects by the moment and finding solutions by using different materials and overlaying UVs in order to get more resolution in the textures. I also had to experiment with materials in Unreal for, for example, creating the translucent mask material that I wanted to look like gelatin, having to tweak the settings in order to get a realistic looking of the material.
The project also allowed me to be more aware about the game industry planning and schedule constraints and improve time management of the projects as well as reduce procrastination and have stress, demotivation and depression under control.
Working as a group also allowed me to experience how would feel working in a real game project and give me opportunities to had good and quick feedback of my work in order to improve it with ease as well as having help if something went wrong or I got stuck in any process. It also allowed me to help others sharing my opinion, resources and ideas in order to improve the overall project.
Finally, I think I have learn a lot during this course as I started knowing very little about game production but, It has been during the last three months where I feel I have learnt the most thanks to tutorial feedback and group support, having enough time to improve and work on a big project and researching about the forefront techniques and apply them to my work improving drastically my workflow and skills.
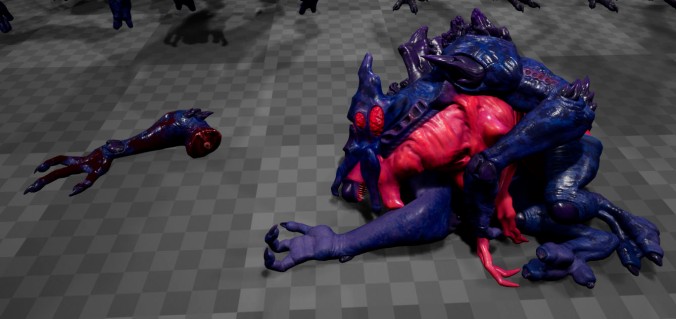
With both characters animated I moved on in order to create the assets I had in my planned schedule, the cut arm and the dead body of the minion, as well as create different textures for the minion using different colour variation.
In order to create the cut arm I decided to reuse the minion model extracting a part of the arm and filling the gap with polygons. I used a cylinder in order to give some geometry for the bone and then I filled the gap using extrusion and bridge in order to close the mesh.
For the textures of this arm I exported and baked the model in substance and painted the new part of the section of the arm and the bone and another textures with alpha in order to put blood on the reused texture of the aliens body.
For the creation of the dead body I used the rigged model and posed it as it was dead. I had a lot of problems due to the complexity of the pose and the deformation that the articulation had done to this extreme pose. I used the same textures as the original as I imagine that decals can be used inside the game to put different blood patterns on different bodies.
In order to create different textures that add a different palette for the minion I opened the original minion’s substance project and started to make modifications changing layers, colours and adding new ones to control the saturation and hue. I exported the textures and set all the assets I have in unreal creating a master material in order to create all the basic materials for all the assets. I migrated the material I did for the mask in the old unreal project file and I borrowed the material Ryan made for his hair in order to modify it to use it in my leader model.
Being at the end of my project I think I can now reflect on how the project has been going and the decisions I made during this process.
I decided to do the alien characters for diferent reasons. First, they allow me bigger freedom and creativity in the conception and design of the characters. Second, my lack of knowledge would be less evident and possible errors could be easier overlooked or considered as part of the alien behavior or design. Finally, I will have plenty of other artist reference to use in my design as is a very usual topic and even animal references can be used on this matter.
I created two different creatures, themore bestial and primitive minion and the more humanoid and intelligent looking leader. Nevertheless, they would have to share different features that would show that they are part of the same race like same number of fingers, similar horns and skin.
I decided to use the following working process as is the most extended workflow in game industry. Starting creating the High poly mesh in Zbrush, then retopologizing the model into a low poly model that can be used inside a game engine like Unreal 4. Texturing the models using substance painter and setting the shaders and assets in unreal. I decided no delegate the rigging and animating process even I am a character artist because in that way I could get a better understanding of the problems and difficulties a rigger and an animator will have to face when they will work with my models. I had to solve this problems during the project process taking me a lot of time to figure out how to solve them, having to create more complex joints and IK handles and being creative in order that the movement of the character didn’t look weird.
During the UVmap creation I have to face a very time consuming correction as I followed Neil’s recommendation of using UDIMs in order to create the characters maps to find after days of work that UDIMs tiled textures can’t be used inside Unreal. This forced me to find another way to get high resolution or control in the quality of the textures. Finally, I decided to use overlapping UVs using different materials in order to have a different texture per material.
As I am still not an expert in Unreal I had to ask for advice to Lee Devonald in order to create the material for the mask as it was a very complex material as well as borrow Ryan’s hair material in order to use it in my own character due to knowdlege and time constraints. This helped me to improve drastically the final look of my characters.
I am happy with the overall result of my part of the project. There are still space to improve the characters like adding SSS materials to improve the realism of the skin but I wanted to do the whole character creation process which take me too much time. In future projects, I will improve my skills with unreal in order to improve the results of my models.
Horizon Zero Dawn (Guerrilla Games, 2017) is a action role-playing video game and exclusive for PlayStation 4 platform. The Backstory goes around Aloy, a hunter that lives in a world infested by robots who have taken the place of the animals. The objective of Aloy as a hunter is to destroy and scavenge those robots in order to get resources while the player discovers the backstory of the character in a very interesting and thrilling storyline.
Guerilla Games are best known for their Killzone franchise now with Zero Dawn open the doors of a new one allowing them to expand their horizon to new types of games.
They have developed their own game engine called Decima that was used in previous games like Killzone Shadow Fall (Guerrilla Games, 2013) and was altered in order to adapt it to the necessities of this new game in order to have a biggest draw distance and loading speed in order to work in an open world game.
The game was very successful being the best-selling game during its release week in the UK and is the most successful title in PS4 since Uncharted 4. It has won several awards like Game Critics Award 2015 and 2016 for original game and Develop Awards for animation in 2017. A expansion of the game called The Frozen Wilds were announce this year at E3 giving new content to the original game.
Graphically the game is astonishing, the designs and concepts are incredible and the graphics are out of this world. Especially characters’ models are very realistic, being the hair the most distinctive aspect of them which has reached an incredible amount of detail to be rendered on a real time engine. One of the main Character artists who were on charge of the modeling of the hair is Arno Schmitz who did Aloy’s, the main character. The Hair was done by Jonathan Lithvall with 100k triangles to be fully dynamic. It was driven by 50 splines with a stable 30fps on PS4.
The technology and complexity used in this hair is amazing, I wanted to talk about it as it relates directly with my intention on doing a ponytail for the alien leader, obviously a lot less complex due to time and knowledge constraints. Knowing how complex the hair can be in a character and how many triangles can be used in a main character’s hair will allow me to produce my model with more accuracy and using the industry standards.
ArtStation (n.d.) Horizon: Zero Dawn Environment Work, Matthijs Verkuijlen [Online]. ArtStation. Available from: <https://www.artstation.com/artwork/ymzmQ > [Accessed 13 August 2017].
ArtStation (n.d.) Horizon: Zero Dawn – Meridian Shaders/Textures, Stefan Groenewoud [Online]. ArtStation. Available from: <https://www.artstation.com/artwork/WQga2 > [Accessed 13 August 2017].
I have completed all the assets, including animations and props. I also put all of them inside unreal and started to make materials using instances of the master material I have created to have everything prepared to give it to Nandor so he can put it on the final Cinematic. I have been able to finish the process with success. My biggest fear was that I couldn’t have everything on time for Nandor to set it up on the cinematic. Nevertheless, as all the members of the group have had this problem and I have been able to save quite a lot of time in the animation and props production I think I have been able to get everything on time. I sent Ian an email at the before starting the alien leaders animations in order to change its running animation for a walking animation, as well to cancel the production of a set of voice recordings I was going to do for the demo we were going to do as a final artefact. Nevertheless, Robert found itself without time to do so, so finally we are going to present a cinematic instead, so the recordings are no longer needed. Ian allowed me to change my planned deliverables in that way so all the deliverables are almost done. I still need to make the promotional video, make an artefact for my work, in this case will be a video of turnarounds and details of the characters and finally, create the presentation slides and prepare myself for the presentation.
With both character’s rigs done I started to do the animations starting with the most basic ones, the idle and the attack and then looking for some tutorials in order to do properly the running and walk cycle. I did one animation per day to save time as I am running out of it. I had problems again with the head, I discovered that I was keying thehiddenn controller I made to fix the problem I had with the head not following the movement of the body. In order to fix this problem I unselected this controller each time I do a key and it worked just fine.
When I finished my first animation, Ryan recommended me to use references inside of may in order to create the different animations with referenced to the same original file. I followed the next tutorial in order to do so and started using this methofology from that moment but keeping the animation I already created in order to save time.
Bibliography:
James Thompson (n.d.) 66 – Referencing Rig Files (Cartoon Character Rigging Series) [Online video]. Available from: <https://www.youtube.com/watch?v=UK2U2fHkYQk > [Accessed 12 August 2017].